Elements of HTTP Request/Response, HTTP Methods
Welcome you all to the brand new ‘API Testing’ blog series! In the previous blog, we had learned about the basics of API. Let us continue our API testing journey!!
1. What you will Learn in this blog ?
- Components of HTTP request
- Components of HTTP response
- HTTP methods (Get, Post, Put, Delete)
2. Components of HTTP request
We have seen in the previous blog that Client-Server communication involves HTTP Request and HTTP Response.
Let us now learn about the elements of HTTP Request. Below are the components of HTTP Request:
- Request URL, Request method, Request status code;
- Zero or more Request Headers;
- Request Body (optional)
Let us understand these components one by one.
3. Request URL, Request method, Request status code.
Let us open chrome browser and launch
https://opensource-demo.orangehrmlive.com/index.php/auth/login

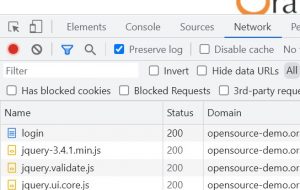
Press F12 key and click ‘Network’ section as shown below
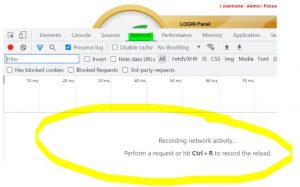
Right now you would NOT see any HTTP requests (see yellow section in above figure).
Refresh the website or press Ctrl+R. You would now see lot of HTTP requests in the Network section as shown below
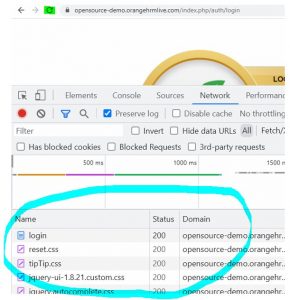
Select ‘login’ request

On the right hand side, you would see ‘Headers’ section comprising of
- General
- Request Headers
- Response Headers
Let us expand the ‘General’ section
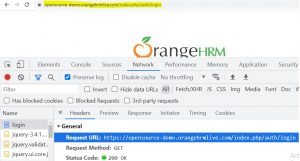
The ‘General’ section has information about
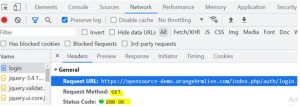
- Request URL (this matches the url in the address bar), this is the same url that client has requested;
- Request Method is of type GET (since the client is requesting a read-only information from server, client is NOT posting any data on server);
- Request status code is 200 since the server was successful in serving the client request.
4. Request Header
Let us now expand the ‘Request Headers’ as shown below
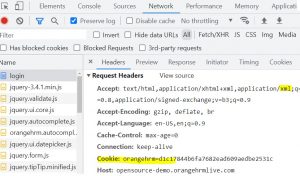
5. Request Body
Request body is optional that may or may not be submitted as part of request. The body could be either in the json or xml format.
As of now we haven’t sent any login credentials (Username and Password) along with the HTTP request
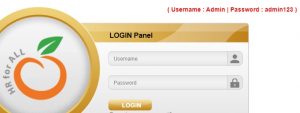
That’s the reason, we do not yet see the ‘Payload’ section (see below). Payload is same as the body section

Let us now enter the Username/Password as Admin/admin123
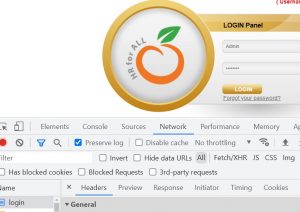
Click LOGIN. After successful login, look for the validateCredentials http request as shown below
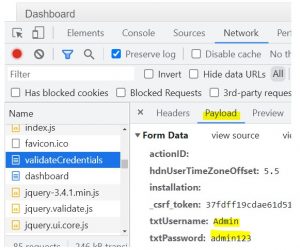
On the right hand side, you will now see the body section ‘Payload’ as shown above. This section shows us the information (username, password) that we had sent as part of request body.
6. Components of HTTP response
Once client hits the request, the server processes the request and will send the HTTP response back to the client. So the HTTP response contains the data or information requested by the client.
HTTP Response also has the similar set of elements:
- Response Header
- Response Body (optional)
Let us understand these components one by one.
7. Response Header
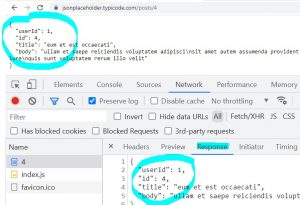
Let us hit the url https://jsonplaceholder.typicode.com/posts/4
We will get the below response

Press F12 and refresh the page. Expand ‘Response Headers’. Notice below that we can see the server side header information like the server name etc
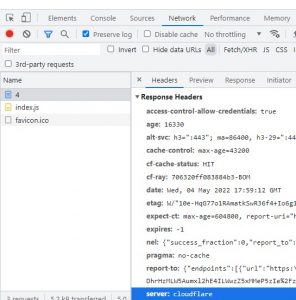
8. Response Body
See below. We have the ‘Response’ section that shows the exact same information which we get when we hit the url
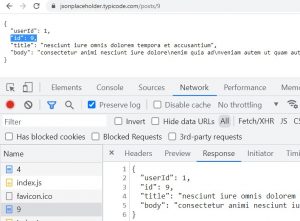
Let us change the request url https://jsonplaceholder.typicode.com/posts/9
Notice below that the body of the response changes
9. HTTP Methods
The client hits the request URL to perform some operation on the server. The HTTP methods or operations that can be performed on the server are:
- Create new data on the server (HTTP POST method)
- Update the data on the server (HTTP PUT method)
- Read data from server (HTTP GET method)
- Delete the data from the server (HTTP DELETE method)
These 4 methods are also known as CURD operations (Create, Update, Read, and Delete).
Let us discuss about Read and Create operations.
10. HTTP GET method (Read)
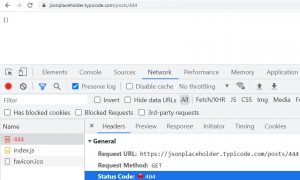
The GET request is used to access some information from the server. The GET request does not modify any data on the server. If the requested data is found on the server, the server returns ‘200 OK’ status code as part of response body
11. HTTP POST method (Create)
Whenever we create/post a new comment on twitter/facebook/linkedin, we are basically making an HTTP POST request that creates new data on the server.
If the data is successfully created on the server, the server returns ‘201 Created’ status code as part of response body. To simulate the POST request, download, install and launch postman (postman is used to manually test the APIs, we will discuss in detail about the postman later).
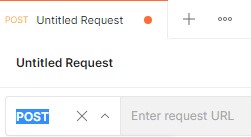
Click + to create a new api request as shown below

Select POST from the dropdown since we want to post new data to the server
Launch https://jsonplaceholder.typicode.com/posts/
Scroll down to the page end, notice that this page contains data up to id:100 as shown below

We will post and create a new id.
Copy Request URL and paste it in ‘Enter request URL’ field

Next, select Body > raw > JSON as shown below

Next, copy the below json section

Paste it in the body section
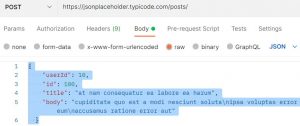
Change id to 101 as shown below
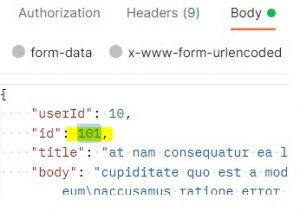

Click SEND
Notice the response body status ‘201 Created’

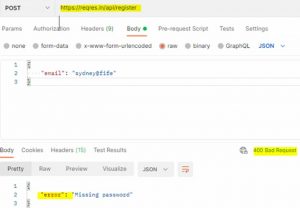
If the post request fails/unsuccessful, than the status ‘400 Bad Request’ is shown. See below, we get ‘Missing password’ error (the request url is different)
So, this was quick glimpse of GET/POST requests.
Just a side note: The network timelines section takes the extra space on our webpage. Since we don’t need the network timelines section, we can disable the same. To do that, click the ‘Network Settings’ gear icon

By default, ‘Show overview’ checkbox is checked

Just uncheck ‘Show overview’ checkbox. The timeline would disappear as shown below

Click ‘Network Settings’ gear icon again to hide the greyed-out checkboxes that you see above
Thank you for reading!
